In this guide, you will learn How to Root Yureka Plus & Install TWRP Recovery.It is a very easy process.Just follow every step given below carefully. Yureka Plus is a very good budget friendly android smartphone.It is already available in the market. If you are one of the users and want to root it then just follow the step by step guide on How to Root Yureka Plus & Install TWRP Recovery. First of all, you have to Unlock the bootloader of Your Yu Yureka Plus, then Install TWRP recovery and lastly flash the Super Su zip to get root access on your Yu device.
Related Posts: How to Root ZTE Nubia Z9 Max & Install TWRP
Important:
Make sure there is at least 80% battery left on your smartphone before begin rooting your device. Before following this guide do take the full backup of your phone like data, images, video, files, emails, contacts etc Install the ADB and Fastboot drivers on your PC
How to Root Yureka Plus & Install TWRP Recovery Warning: rootmygalaxy.net will not be held responsible for any kind of damage occurred to your Yureka Plus while following this tutorial.Do it at your own risk. Remember Before rooting: How to Root Yureka Plus & Install TWRP Recovery
Rooting your phone can void your warranty After rooting you can tweak your phone You can unroot it if you want You can overclock or underclock your CPU to make your phone faster Enable USB debugging on your Yureka Plus smartphone, go to settings » developers option. If developer’s option isn’t visible on your Galaxy device, simply go to about phone under settings and scroll down to build number, then tap build number up to 7 times to make developers option visible.
How to Root Yureka Plus & Install TWRP Recovery
Step By Step guide
Unlock the bootloader
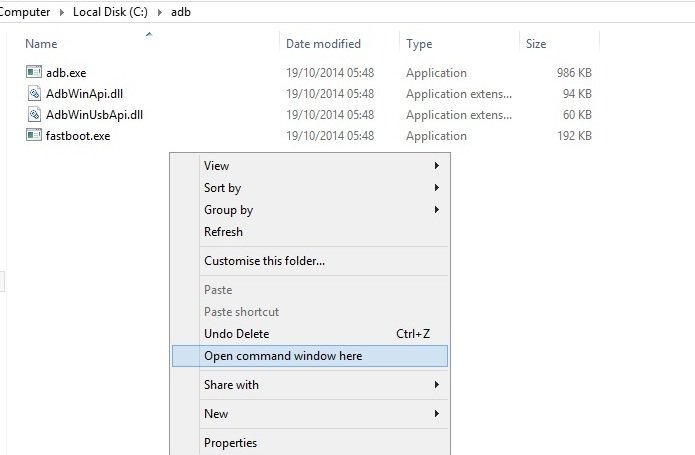
First do all the things which I mentioned in the Important section. Now Go to Developer Option and disable Update Recovery Download the TWRP recovery for the Yureka Plus here Save the recovery img file on the ADB folder where you created (Important section) Now Connect your phone to the PC with USB cable and open a command prompt window in your fastboot/adb folder (C:\adb). (Hold Shift button on your keyboard and right-click on the empty space of the folder). See the screenshot:- (Image: techno buzz)
Now in the command prompt windows enter the following command:-
If your device is connected you will get it in connected devices Now enter the following command to boot your phone in bootloader mode:-
Now Your phone will restart into the bootloader. You need unlocked bootloader now. Run the command below to check whether the bootloader of your device is lock or unlocked. By default, it comes locked.
If your bootloader is unlocked, it will say “True”, else it will say “false”. If it is False, then do the next step Now enter the following command to unlock the bootloader
Now your phone will reboot automatically, if not enter the following command to boot.
Now bootloader is unlocked
Install TWRP Custom Recovery on Yureka Plus:
Now again type the below command to install TWRP (From the fastboot mode)
Now the TWRP recovery on your device. Now, boot your device into recovery mode. For this, first enable the Advanced reboot option in Settings > Developer options. Then hold the power button to get pop-up, then tap on Reboot > Recovery. You are in the TWRP recovery
Root Yureka Plus:
Download the Supersu ZIP here and transfer the zip file on your phone.(internal memory and remember the location) From the TWRP main menu go to install Navigate to where you saved the UPDATE-SuperSU-v2.46.zip file. Flash the SuperSu, now reboot your device from the recovery main menu.
DONE!!! Your Yureka Plus is now rooted. To verify the root status install Root Checker.