Backups are an indispensable part of our lives. Whether it is the complete backup of our Android device or any section of media files that we need to secure, backups are the prime solution. It is a nightmare to lose all the data only to later realize the importance of the creation of backups. Android app market is full of third-party apps that assist with backup for rooted phones. Unlike the Apple OS, Android does not have facilities like ‘iCloud’ which assist in backing up data without having the requirement to root the device. Thus, Android largely lacks a comprehensive solution for backing up apps and data. Therefore, it seems challenging for non-rooted users to backup their data. Recent advancements in the field of app development have led to the launching of apps specialized to address support towards android backup without root. Full tutorial on How to backup important data on Android devices : You May Like
How to hide files, photos, videos and apps on Android Without An App How To Download & Install Remix OS 2.0 On Your PC or Laptop Download & Install WhatsApp Desktop App On Windows & Mac
How To Backup Important Data On Android:
This guide is only for nonrooted users. If you have a rooted phone then you can take an android backup from TWRP recovery or use Titanium Backup. Guide: How To Create & Restore Nandroid Backup On Android Devices (rooted users) But if your device is not rooted then you have to take backup by an android app. Don’t worry. Here is a small step by step guide to backup Important data On Android without rooting by the use of ‘Helium’ Android app:
Download
Helium App.Download from play store [icon name=”hand-o-down” class=”” unprefixed_class=””] [su_button url=”https://play.google.com/store/apps/details?id=com.koushikdutta.backup&hl=en” style=”flat” icon=”icon: download”]Download Here[/su_button] (free In the Play store)
How To Backup & Restore Android Phones Without Root
STEP 1: Install HELIUM on your android device
The first and foremost step involves installing the ‘Helium’ app on your android device. This app functions by pairing your Android device with your computer or laptop. After pairing, it exchanges a set of commands that enable the initiation of backup. Therefore, you need to make sure that the ‘Helium’ application is installed on your computer as well. The desktop version for Helium app is available for Windows, Linux, and Mac OS. If you are Windows users, you will have to install additional drivers corresponding to your smartphone model. The drivers are available on the official website of the Helium app.
STEP 2: Launch the app
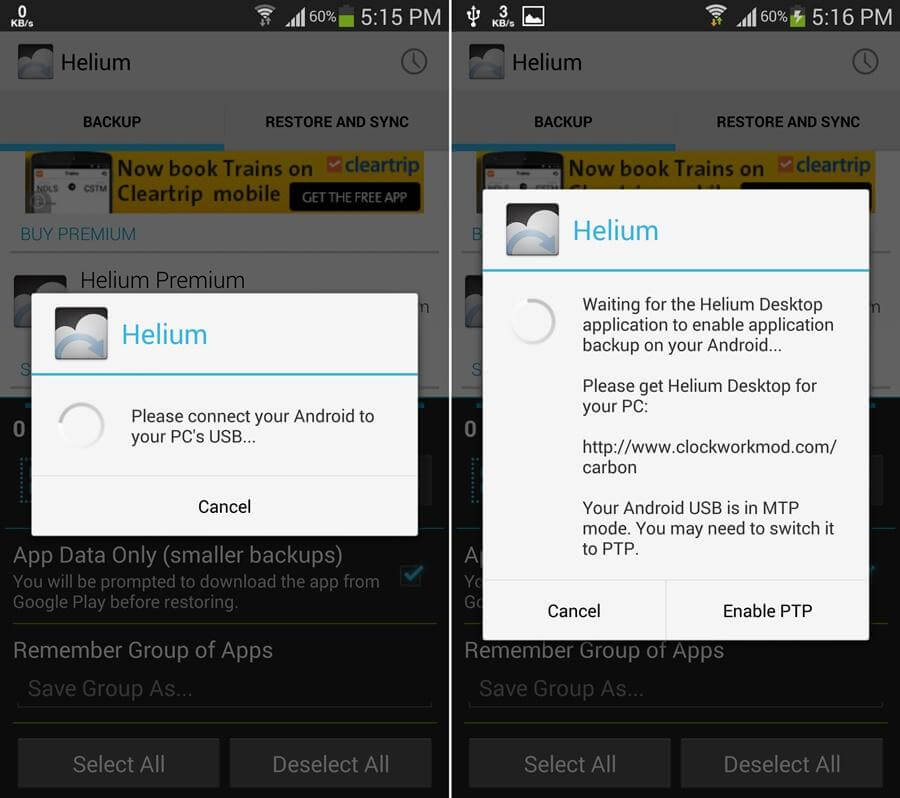
After installation, you need to launch the app on your android device. As soon as you launch, a message would appear prompting you to enable backup by connecting to the Helium Desktop Application. Connect your android device to the computer via a USB cable.
STEP 3: Connecting with the desktop application
Now launch the application on the desktop. The application would automatically search for available devices. Make sure that the USB debugging option has been enabled for the device. After detecting the device, the desktop application would be activated. Now , there is no need for the device to be connected to the desktop via USB cable. So, you can remove the USB cable. Every time your device restarts or reboots, you need to repeat the above process of pairing up as android reset the changes made to helium with every reboot.
STEP 4: Selecting apps for backup
A list of all the available apps (which can be backed up) will be displayed in front of you. On further scrolling, you will find a list of apps which can’t be backed up. This is due to the system limitations that have been imposed by the developers. Select the apps which you wish to backup. You will encounter several options. Checking the ‘App Data Only’ option would backup only the app data. The APK file for the corresponding apps would not be backed up and you would have to install the APK files before restoring the created backup. If you wish to include the APK files as well, you would have to uncheck the option.
STEP 5: Choosing destination for backup
Tap on the backup option. A list will pop up to select the backup destination. You can choose any destination from the list without having to worry about the process. As soon as you select the destination, the backup automatically starts.
STEP 6: Restoring app
Tap the ‘Restore and Sync’ option. In the ‘My Devices’ sections, select the option for which you created the backup. Check the app you wish to restore and then tap on Restore button. The restore process will begin. After a few seconds, the process will be completed. You can check the authenticity of the application by launching the restored app. You will see that the data associated with the backed up app is intact and all the progress is reflected in the restored app. The ‘Helium’ app is available in two versions. The ‘Free’ version has zero download cost but has the inclusion of ads in it. The ‘Premium’ version has additional features like Cloud sync with DropBox, Google Drive. The premium version gives the user the benefits of syncing data files from one android to another android device.
Helium (Free) features:
Backup Important data On Android Backup and restore to SD card Backup and restore from PC
Helium (Premium) features:
No ads Automatic Backup schedules Android to Android sync Cloud backup and restore * Dropbox * Box * Google Drive
Some other apps to backup data without rooting are:
Holo Backup G Cloud Backup Super Backup Easy Backup and Restore
Now without getting involved in the hassles of rooting the device for backup purpose, the Android users can effectively back data. Thus, the missing app sync and backup solution for Android have been achieved. If this guide helped you please share this article with others 🙂 Image Source: Playstore & Theandroidsoul


